Wie Sie mit dem Remote-Desktop von AnyDesk Ihren Bildschirm teilen können

Desktop Sharing With AnyDesk Is Easy and Convenient
Screen Sharing allows us to virtually look over each other’s shoulder and view another person’s screen from anywhere in the world in real-time, without having to send each other screenshots or a screen recording. But what do you need screen sharing for? Think about the many times at the office when you walked over to a co-worker’s cubicle and discussed something on their screen. What were the reasons in these situations?
What Is Screen Sharing?
Maybe they showed you how to use the new tool implemented by IT. Have you and your colleagues ever projected your screens onto the wall in a meeting in order to show a presentation? In some instances, your colleagues maybe wanted you to see what they are working on without having to send you a file first as they wanted to guide you through their work in real-time.
With more and more people working from home, these little moments get lost. Thankfully, all of these cases can be recreated virtually by using a screen sharing tool, such as a Remote Desktop Solution. In this step-by-step guide, we will show you how to easily screen share with AnyDesk in a few simple steps.
How to Screen Share With AnyDesk
If you want to use AnyDesk to share your screen on Windows with another person, here’s what you need to do:
1. Download AnyDesk and Get Started
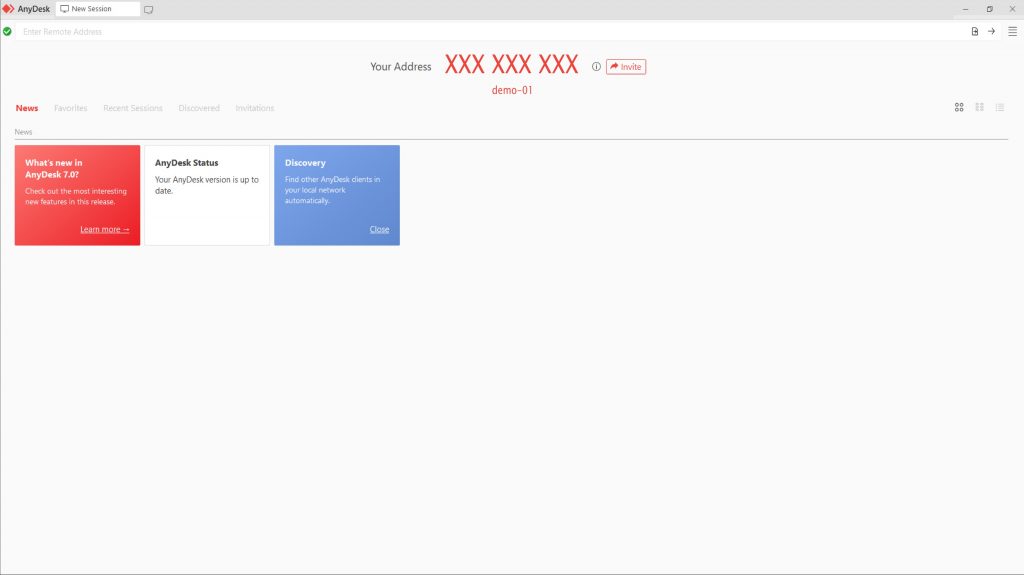
First, download AnyDesk. You can either download it for free for private use or, if you use AnyDesk professionally, purchase one of our affordable and scalable licenses. Either way, as soon as you open AnyDesk for the first time, you’ll see the Home Screen where you’ll find your AnyDesk ID and Alias that can be used to connect to your device. Additionally, you will see an Invite Button next to your ID.

2. Share Your AnyDesk ID or Send a Session Invitation
To allow an incoming connection to your device via AnyDesk, you have the following options:
Option 1: Share your AnyDesk ID directly with the person you want to share your screen with so they can connect to your device. Please only share your ID with people you know and trust. If you right-click on your ID and select Invite via email, an email containing your ID / Alias will be generated. All you have to do is send this email out to the person you want to share you screen with.
After the session, the other user can see your ID in an address tile in the section Recent Sessions on their AnyDesk Home Screen. Next time you want to share your screen, they simply have to double-click on the tile in order to send a new connection request to your device.
Option 2: If you already know the AnyDesk ID of the person you want to share your screen with, you can enter the ID directly into the popup window that will appear after you press the Invite Button. After sending the request, the other person will receive a session invitation they can accept in order to start a connection to your device.
As the sender of this invitation, you have the opportunity to define permissions for the upcoming session in advance by selecting the desired set of permissions on the popup window. The rights you select will then be granted to the person accepting the invite once they connect to your device.

3. Send a Session Request
Once the other person has accepted your session invitation, access to your device is being established without you having to accept their incoming connection again. You have already defined the range of permissions you want to grant them in the previous step. Due to security reasons, the session invitation is only valid for two minutes before it expires. So when you send out an invitation, expect the other side to connect to your device within the next two minutes. You can view the history of your sent and received session invitations in the section Invitations on the AnyDesk Home Screen. There, you have the option to cancel outstanding requests at anytime.
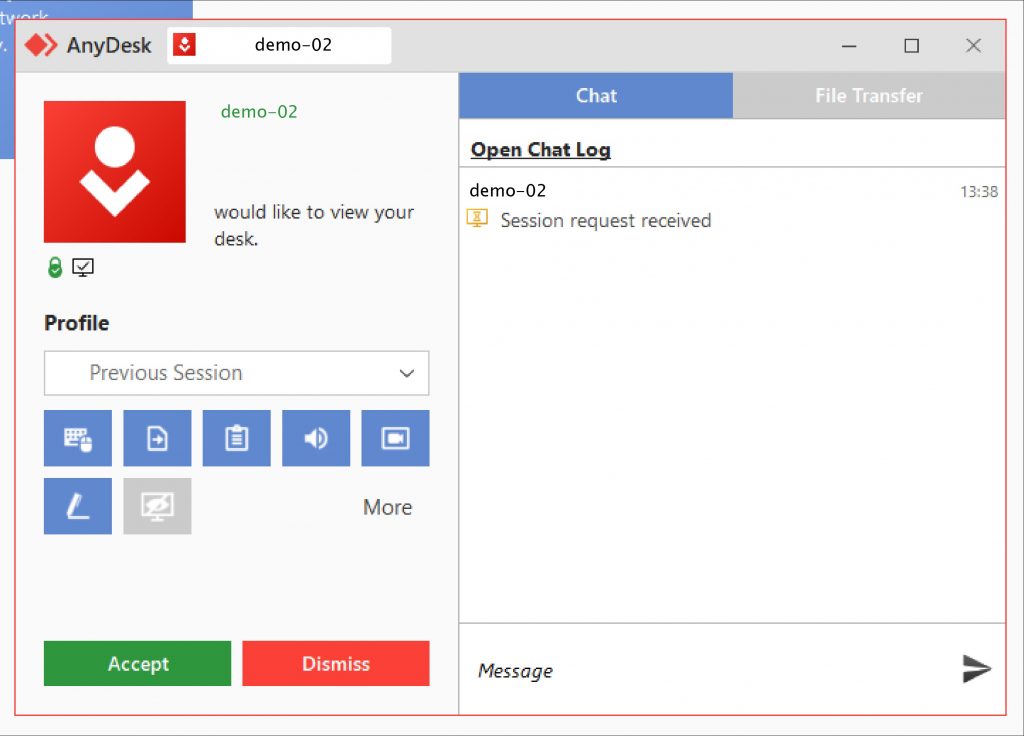
When your device is being accessed without an invitation (as described in option 1), you will receive a direct session request. Before accepting the incoming request, you have the chance to change the permissions you want to grant. The connection will only be established once you press the accept button.

Accept Window of incoming Session Request
Additional Tips for Session Security
If your Remote Desktop session is merely for screen sharing, we advise unticking most, if not all Permissions, so that the other side cannot interact with your desktop. This means denying the use of mouse and keyboard, preventing them from using the clipboard and file manager, and disabling the On-Screen Whiteboard. Permissions can also be defined through so-called Session Permission Profiles. You can either use pre-set profiles, such as the Screen Sharing profile which only allows a passive view of your screen, or create your own individual profiles.
Of course, the chat function will still be enabled and it’s a good way to communicate with the other person if questions arise or if you’d like to clarify something. However, our tip is to still allow the session to be recorded. This is helpful if, for example, you host a tutorial via screen sharing. It allows the other person to re-watch the session at any time.

These permissions can be set in the security settings before the session and can always be changed during a running session. Maybe the other person would like to visualize something on your screen? You can then allow them to use the On-Screen Whiteboard.
What Else Can You Do With AnyDesk?
After your presentation ends, you can disconnect the user who connected to your device by canceling the session through the accept window. As you see, AnyDesk is a simple way to share your screen without having to worry about the connection being unstable, lagging or insecure.
But that’s not all AnyDesk is capable of! From simple screen sharing to complex IT administration tasks, AnyDesk has features for every need as well as high security standards. Download AnyDesk on your device and get started today!
Registrieren Sie sich für Neuigkeiten, Tipps und mehr